West Suburbs: 630-800-6068
South Suburbs: 708-990-2487

Do-It-Yourself Garage Spring Door Replacement
In order to correctly perform the spring replacement procedure, you must understand the components that need to be changed and how to handle certain components. Garage door springs can be dangerous so it is necessary to take preliminary measures and learn the types of springs before performing the replacement procedure.
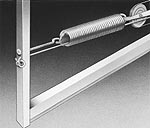
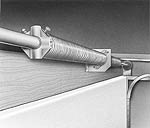
 There are two main types of garage door springs; side-mounted and torsion. It is important to pay attention to where they are located learn how to remove them. Remember, when one spring breaks, you can be sure the other will soon break as well so it is important to change both springs, even if only one is broken. Side-mounted springs are heavy springs that work under the initial tension while the door is closed. They are located on the sides of the garage door. Torsion springs are parallel to the top of the garage door, fixed to a stationary, metal shaft. The spring uncoils to open the door with the released tension.
Once you familiarize yourself with the spring type and mechanism, it is time to replace the springs. The springs will be attached to cable that also bear tension that could be harmful if proper procedure is not followed. The first step is to secure the garage door in a safe position. To do this, the door should be opened fully and held in place with vice grips or C-clamps. This will cause the springs to have the least tension.
The next step is to remove the spring from its position by detaching its end from the mounting point (the door opening’s farthest point). Then remove the lift cable to release the extension spring. This will allow you easily remove the spring from its original position. Replace this spring before removing the other spring.
The eye bolt must be secured to the horizontal track’s hangar to install the new spring. One end goes over the eye bolt. Then attach the front pulley from the door assembly to the other end of the spring with the U-shaped clip wrapped around the pulley. The clip should be secured with a nut and bolt to keep the spring in position.
 The next step is to insert the bolt into the track flag. This is done from inside the door to secure it tightly. Affix the pulley to the outside of the track so it is secured by the nut. Then put the cable back to its original position by pulling it to stretch the spring. You must align the hole-plate with the adjusting hole and tie the cable to the plate. The cable must be pulled tightly to prevent it from loosening.
The cable is then secured to the holding plate’s open end by inserting an S-hook through the adjusting holes. Then slip one end of the safety cable into the back hangar and tie it into place. Then insert this cable through the spring so it comes out through the pulley. Pull the cable tight while tying it to the adjusting hole. Repeat this procedure for the other spring.
While you replace your garage door springs, it is crucial to remember to change all parts as a set to avoid further damage, even if only one spring is broken. Take every safety precaution while removing the springs to prevent series injury to yourself or damage to your property. Always remember to open the garage door completely because this is when your springs have the least amount of tension, making them safe to replace. Be sure to contact a Rush Garage Door professional with any further questions regarding spring replacement or any of our services.

